Determine window location
Unfortunately, there is no standardization about where the windows appears in an envelope, so you'll need to get out a ruler and do some measuring.
There are four measurements you'll need to take:
- The distance from the top of the envelope to the top of the window (in inches)
- The distance from the left side of the envelope to the left side of the window (in inches)
- The width of the window (in inches)
- The height of the window (in inches)
With this information in hand, you can proceed to the next step.
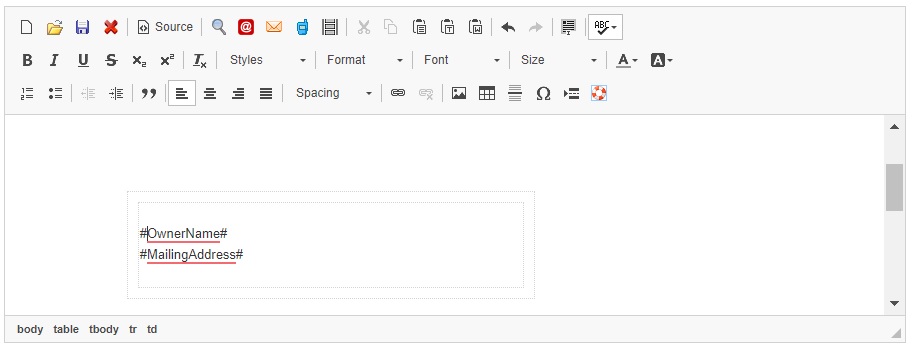
Create an area in your communication at the window location
Step 1) On the Send Communication page, at the very top of your template, add a "table" by clicking the Table icon.

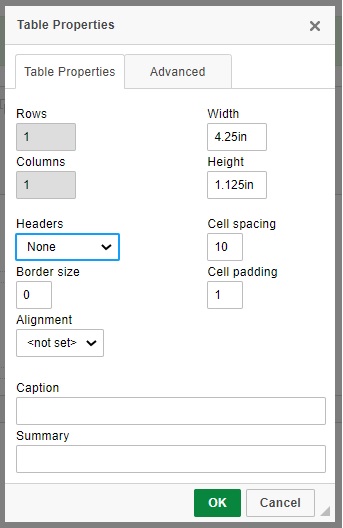
Step 2) On the Table Properties page, specify the following values:
- Rows: 1
- Columns: 1
- Border Size: 0
- Width: this will be the width of the window on your envelope, immediately followed by "in". For example, if the width is 4 1/2 inches, you'd enter "4.5in"
- Height: this will be the height of the window on your envelope. For example, if the height is 1 1/8 inches, you'd enter: "1.125in"
- Cell Spacing: 10
After filling these in DO NOT CLICK OK YET. Before doing that, click the Advanced tab.
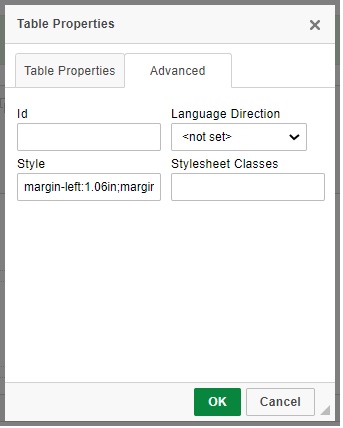
3) Fill out the Advanced Tab on the Table Properties form.
The only field to fill out here is the "style" field, and on this field, you'll specify the position of the window in the envelope, using the following format:
margin-left: x.xxin; margin-top: y.yyin;
Where:
- x.xx will be replaced with the actual distance in inches from the left side of the envelope to the left side of the window
- y.yy will be replaced with the actual distance in inches from the top of the envelope to the top of the window.
When you are done, NOW you can click the OK button.
Specify the text to appear inside the window area
You don't have to do things exactly as specified below, but these mail merge tags are likely to give you what you'd want 99% of the time.